How do I make changes to existing Smap3D Pipelines to make an elbow into a tee and add a new branch to the pipeline?
Click here for a detailed video of this process.
Problem: You need to branch in a new segment to an elbow and change it to a tee connection.
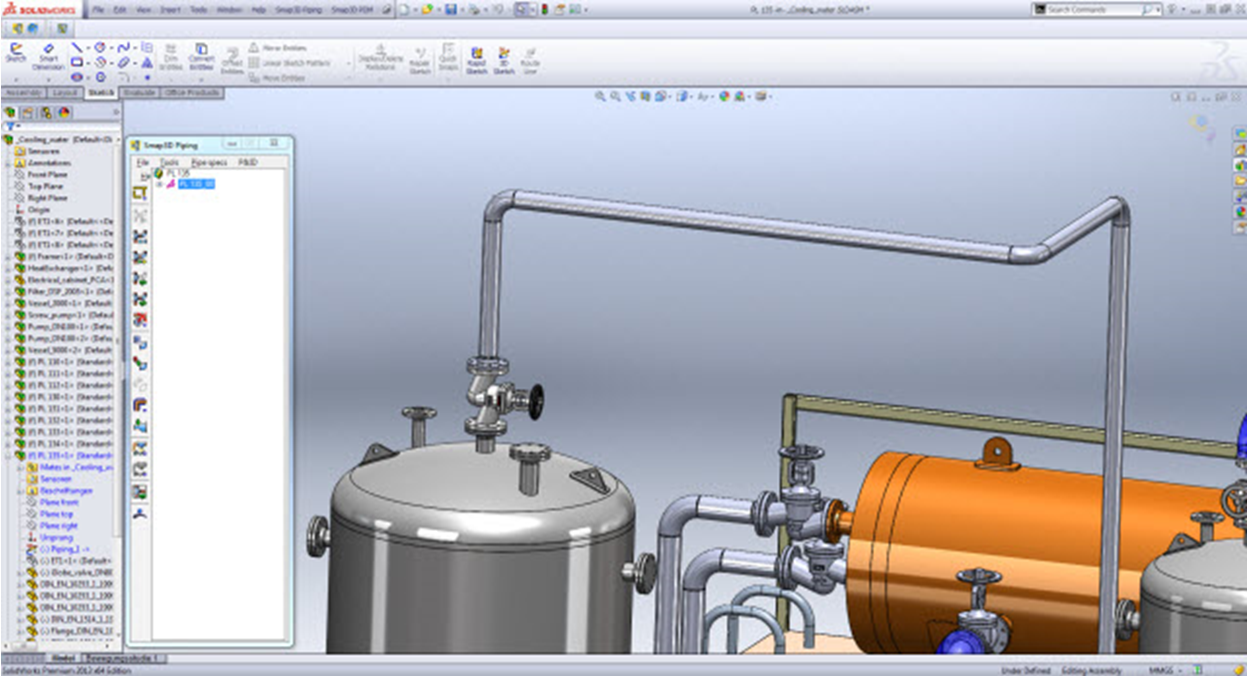
-Edit the subassembly of the pipeline you wish to change so you will have access to the Sketch and the Smap3D Piping features you will modify.
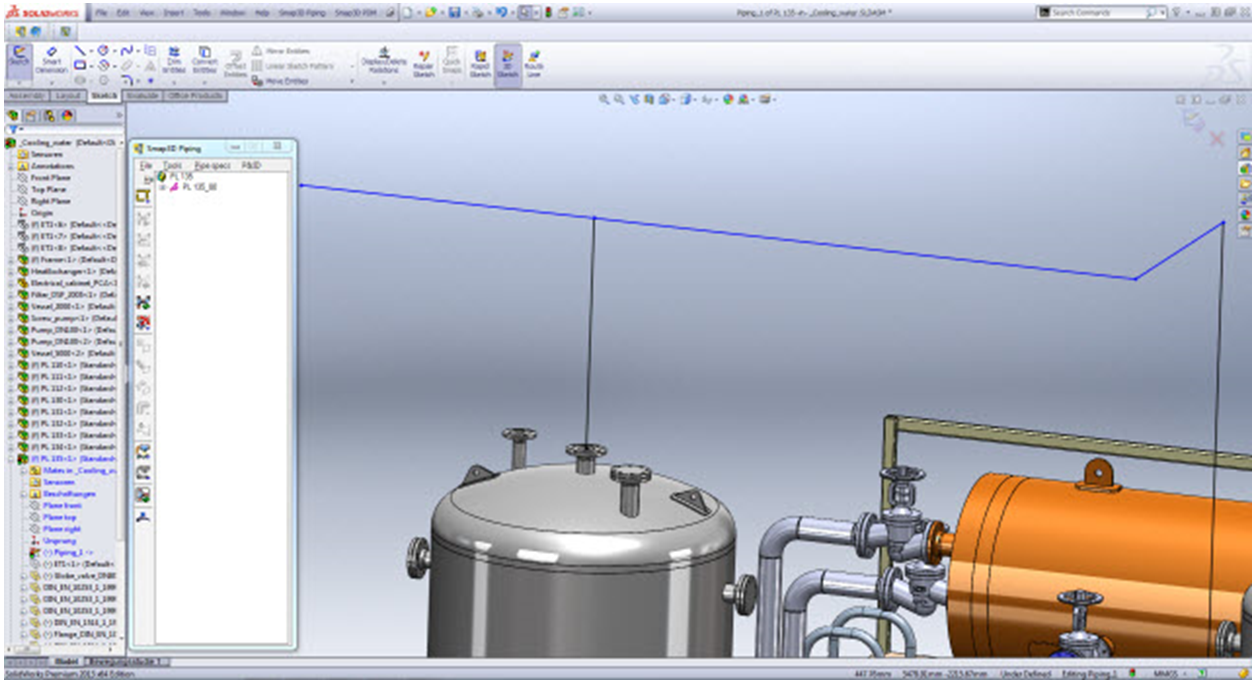
-Edit the sketch used to create the pipeline, add the new segment to the 3D sketch, and exit the sketch.
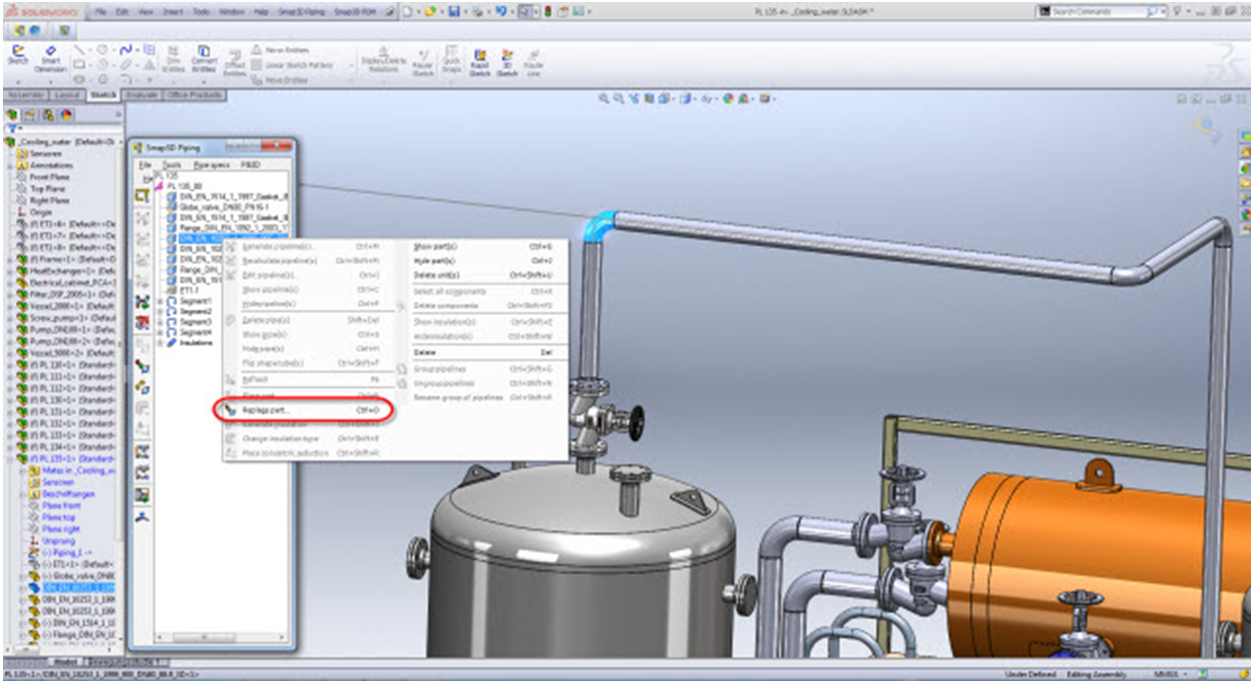
Now you need right click on the elbow in the Smap3D Piping tree and “replace part”.
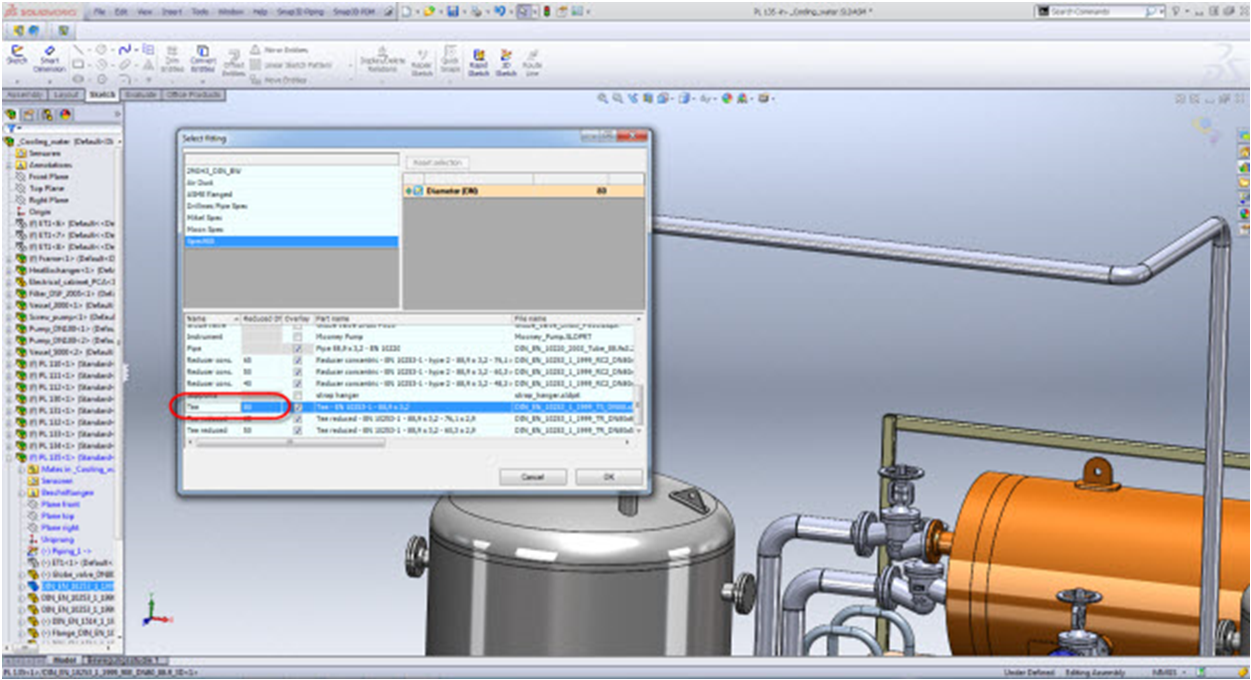
– Select the “tee” from your pipe spec list and click “Ok”. The system will now switch out the elbow for the tee fitting.
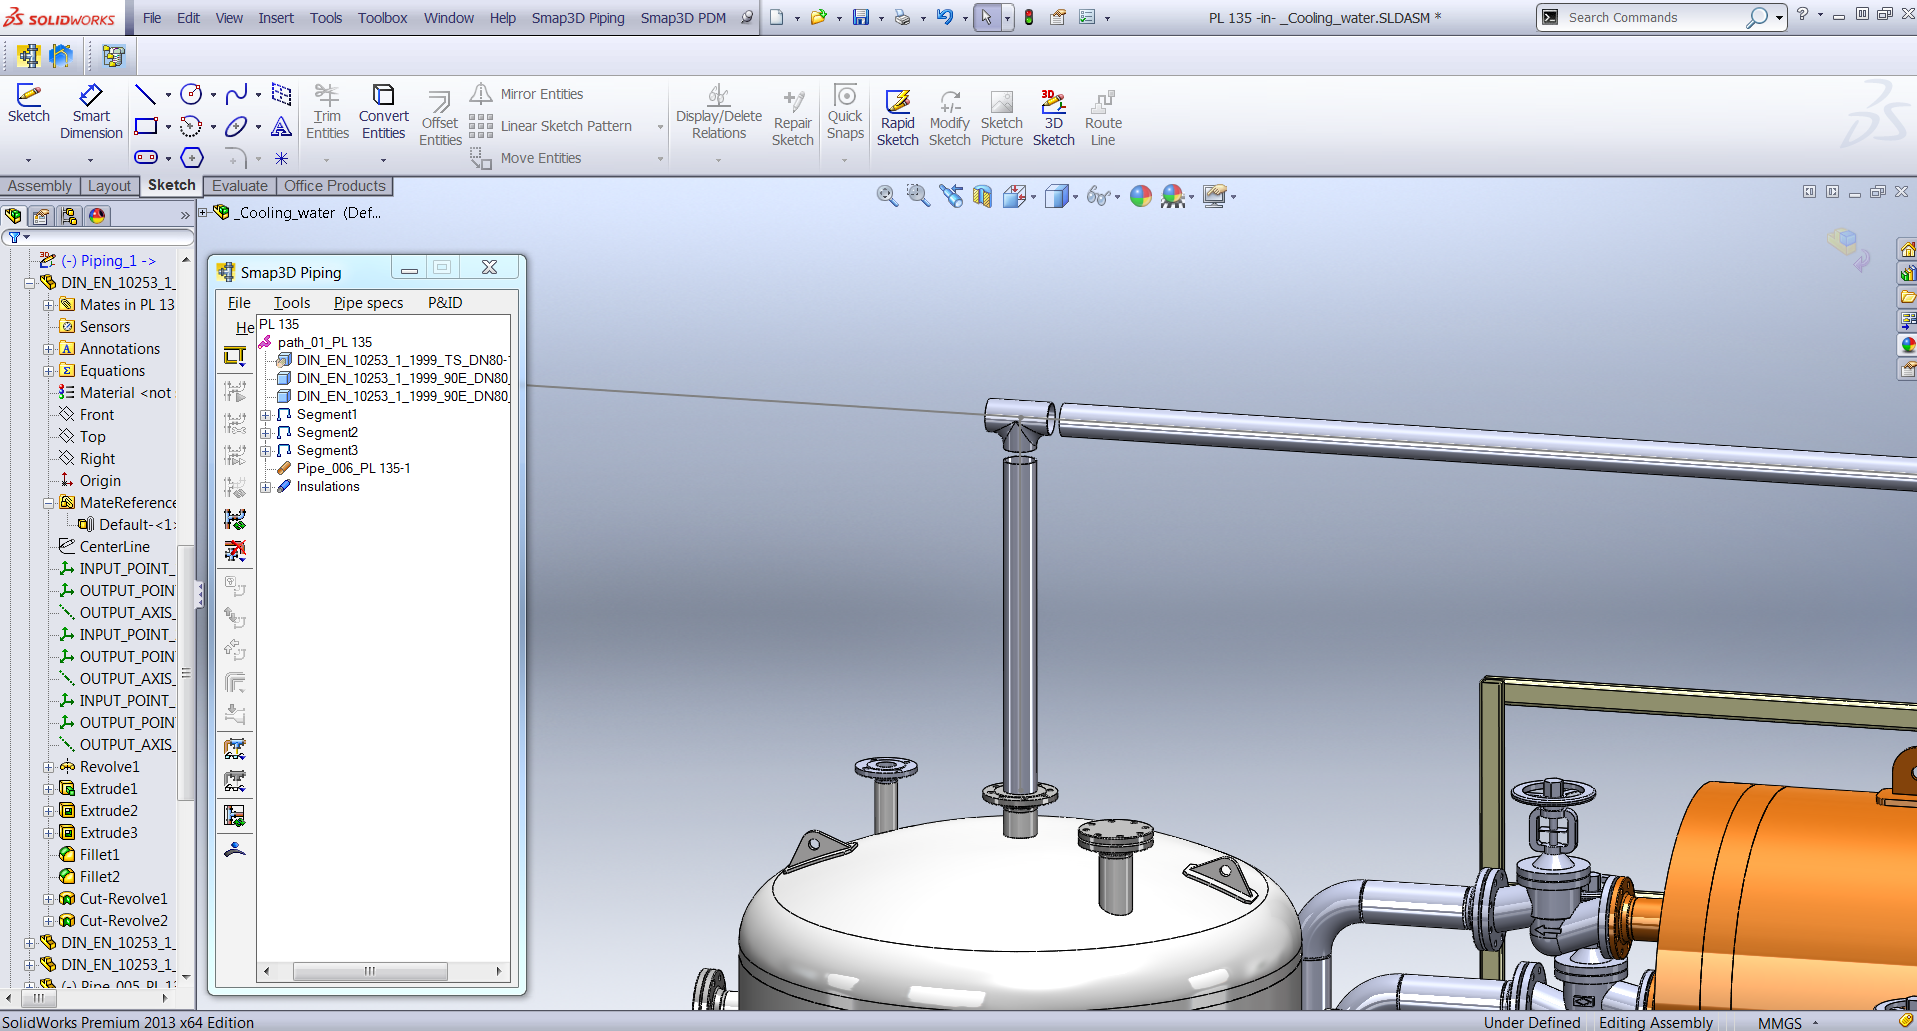
– Notice that when you select the pipe path from the Smap3D Piping tree the newly added segment is not included in the path. This is because when we generated the path originally, that segment did not exist. We need to tell piping there has been a change by generating the pipe path again
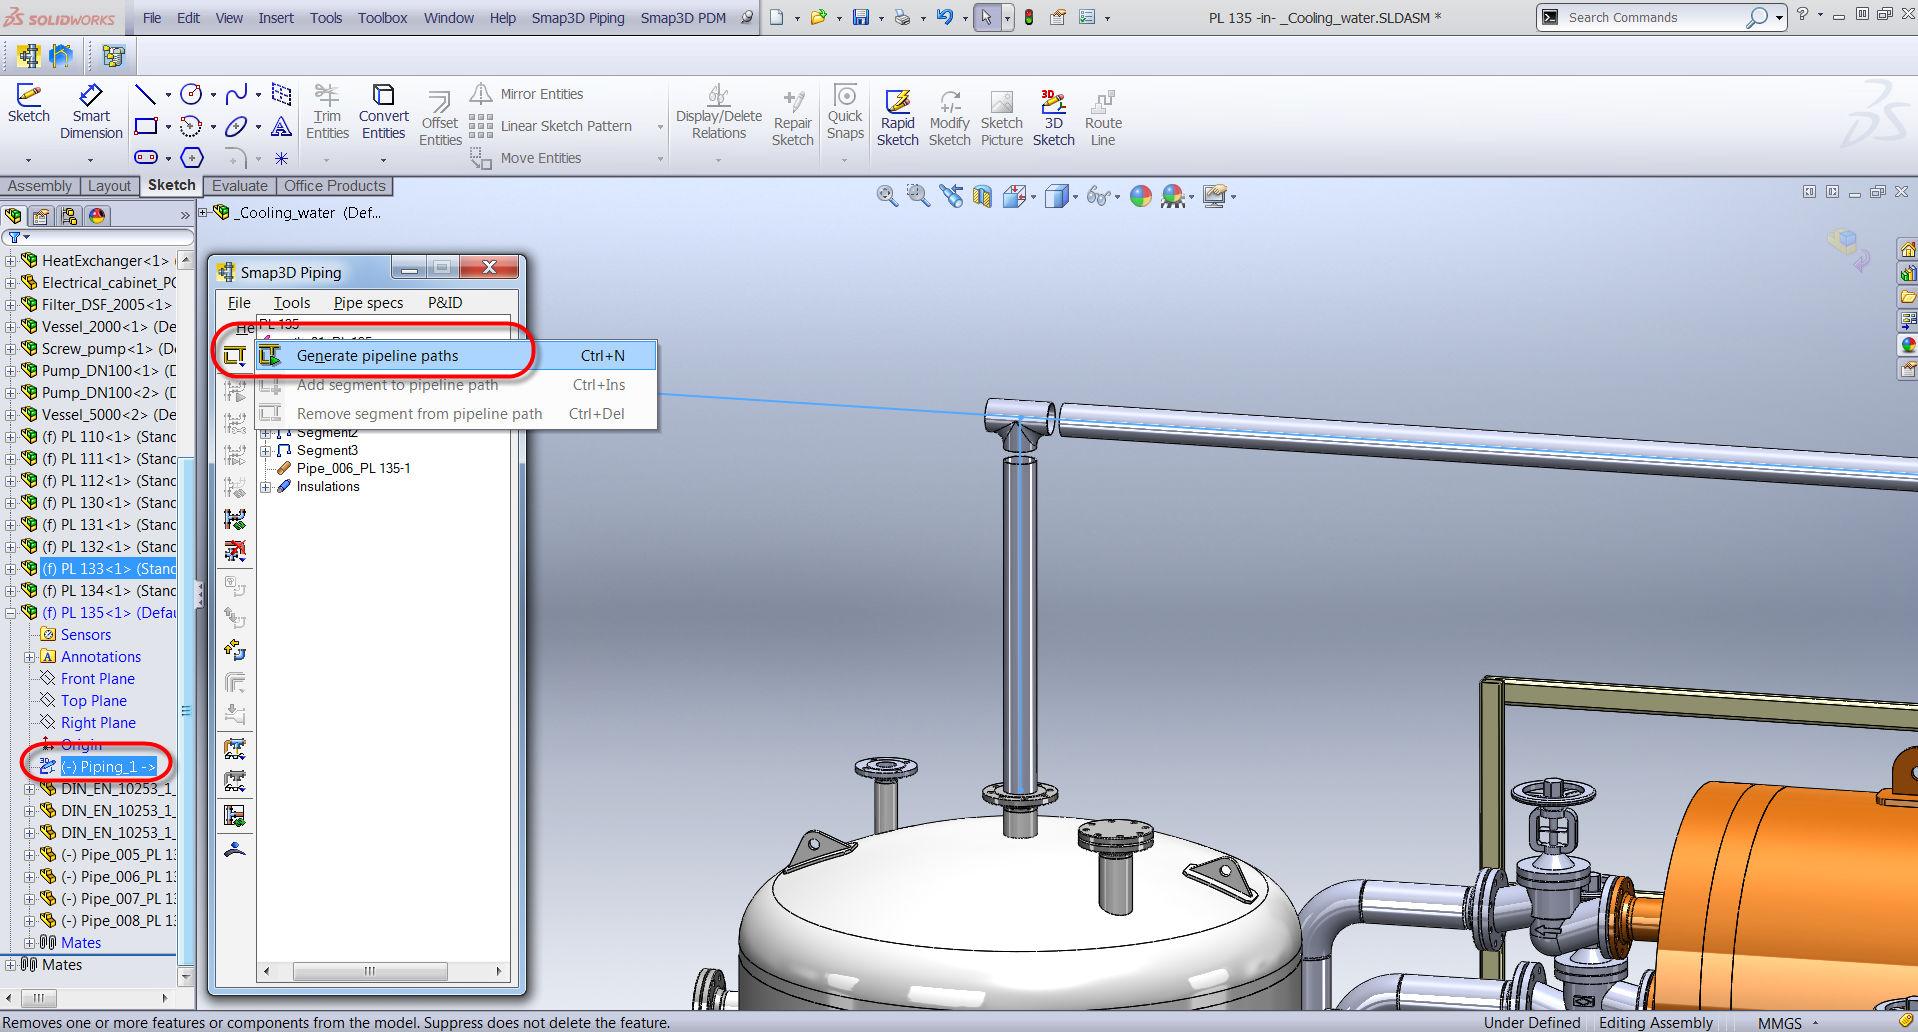
– Select the modified 3D Sketch from the SOLIDWORKS Feature Tree and then click on „Generate Pipeline Paths“ from the Smap Piping Tree.
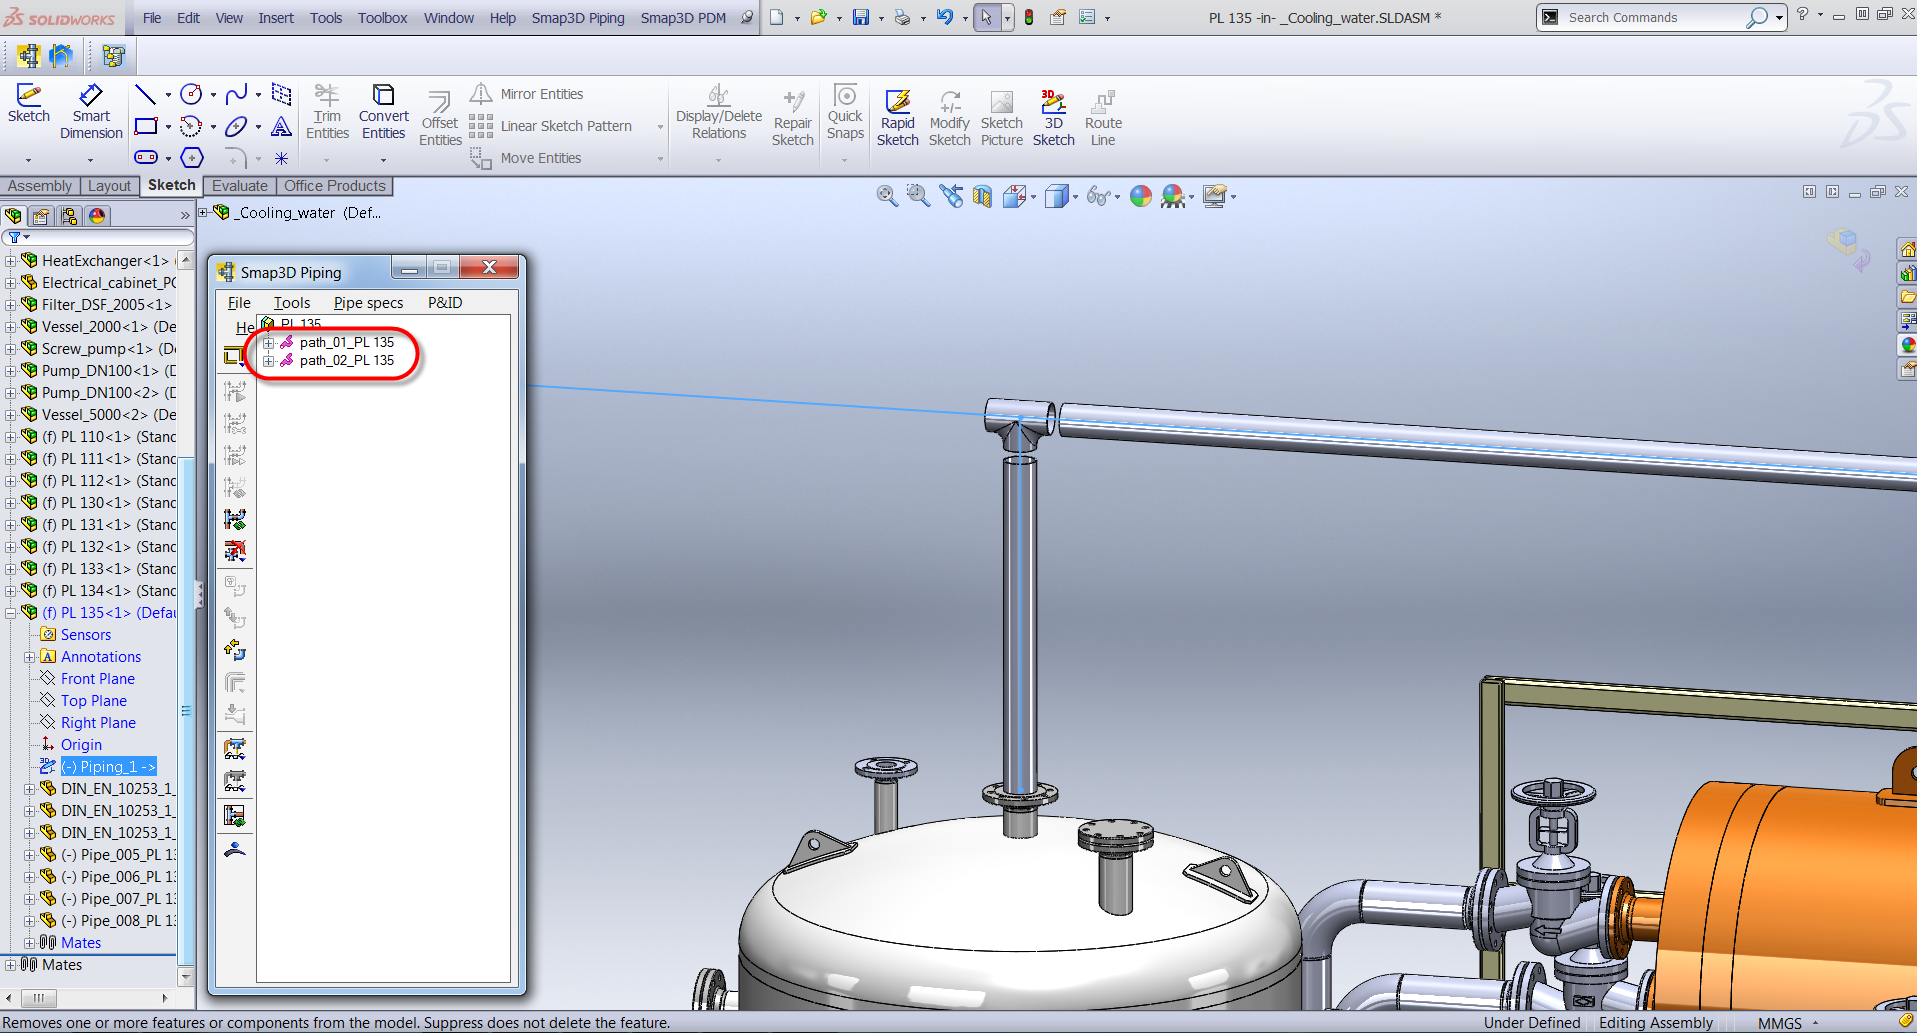
– The system then adds the new pipe segment to the Piping Tree
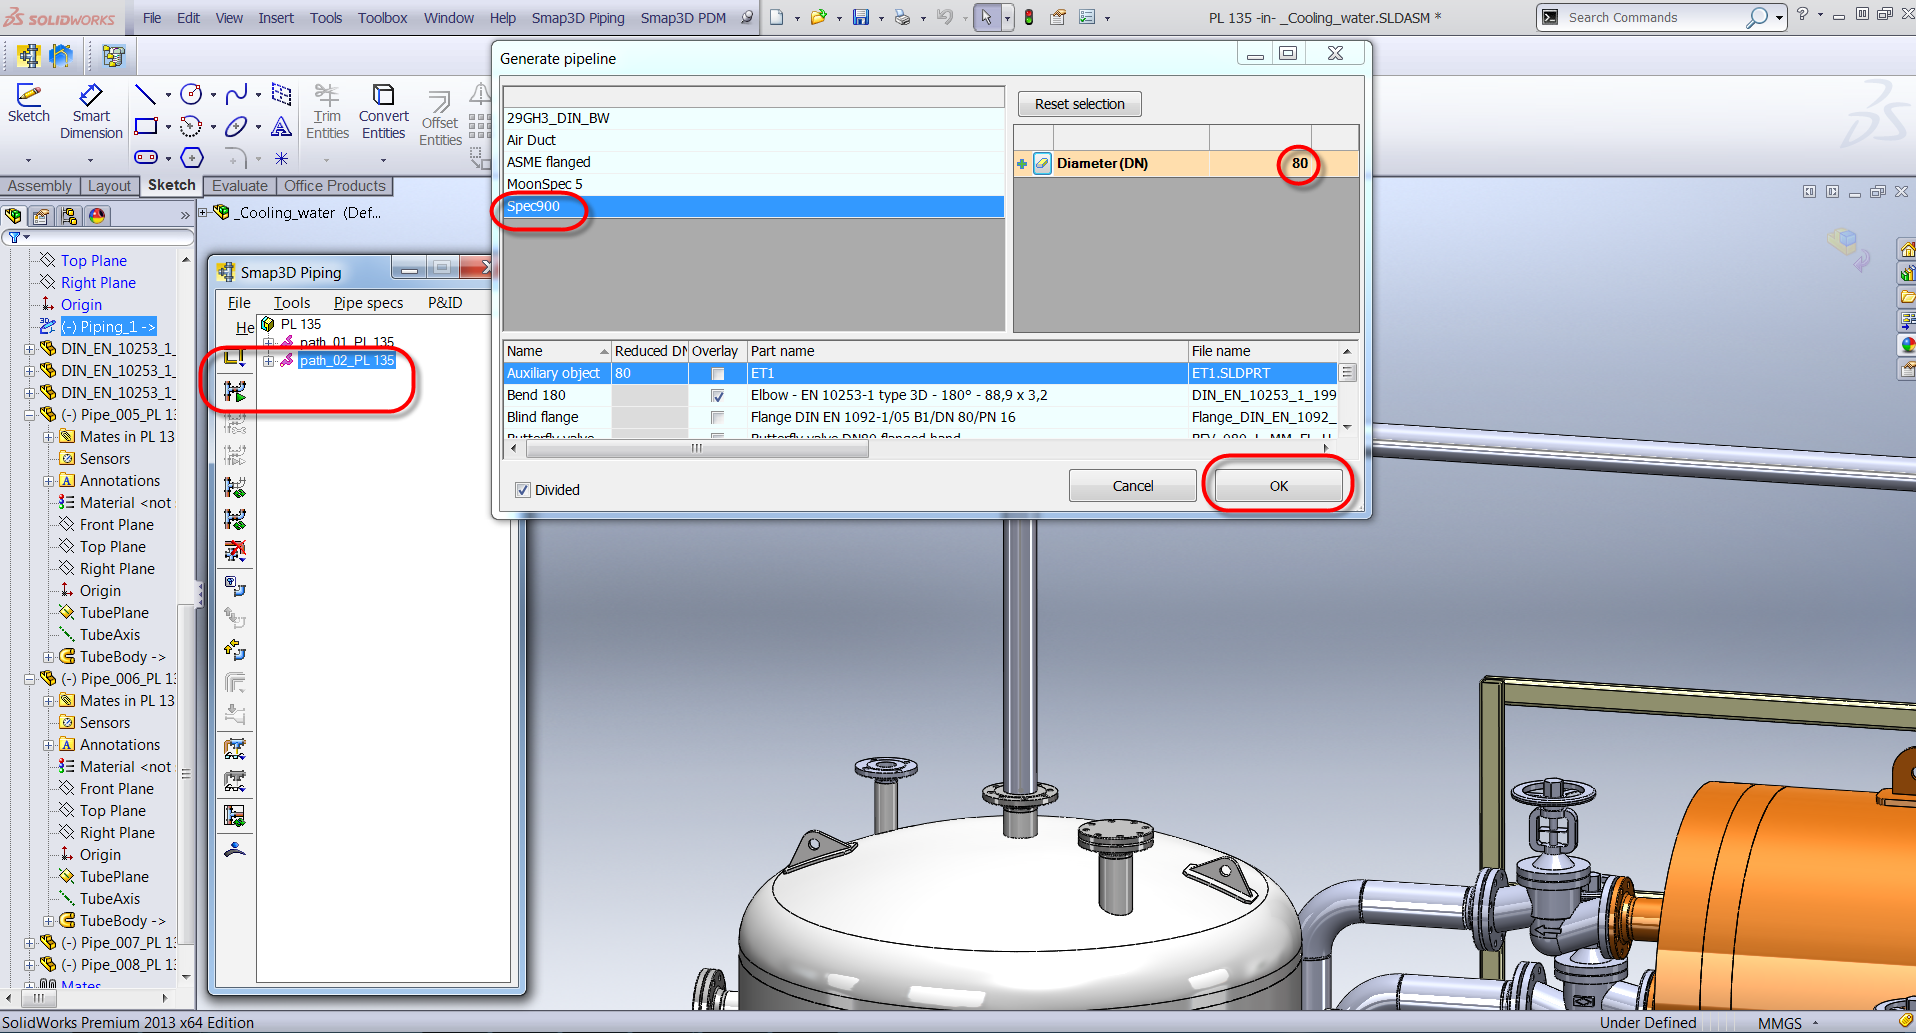
– Now we are ready to assign the pipe spec information to the new pipe path. Select the new pipe path in the Piping Tree and then click on the button „Generate Pipeline(s). A window appears where you can select the pipe spec you wish to use and then choose the size of pipe desired and click on „OK“.
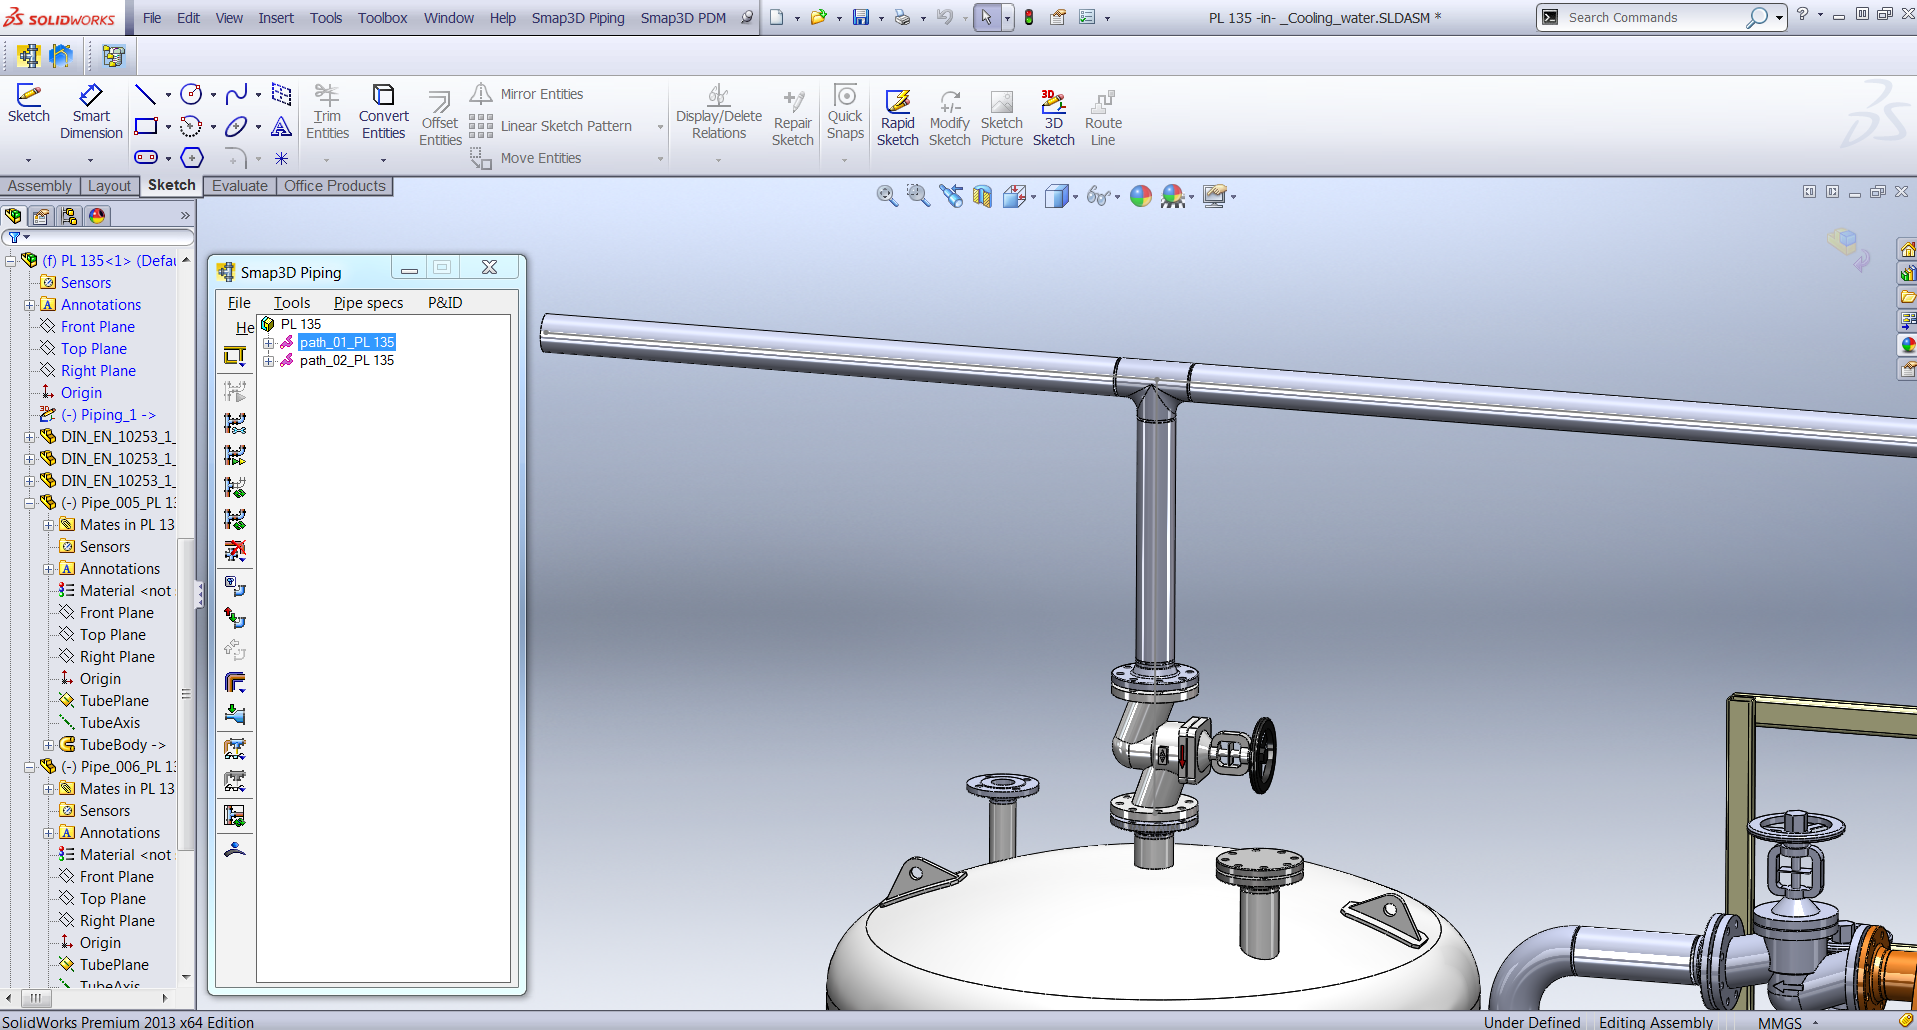
-Finally select both pipelines in the Smap Piping Tree and click on the button „Recalculate Pipeline(s)“ This will ensure that all of the pipes are updated with the correct length and end conditions per the pipe spec you used.
It is always wise to use the „Finish and Save“ fuction from the file pull down menu in the Piping Tree.
#Smap3D #Changing_exsisting_pipelines #Michael_Mooney
 Druck
Druck
