Problem: I need to add insulation to my pipeline, however the “insulation” tool is grayed out. Here are the steps to add insulation to your pipelines in Smap3D.
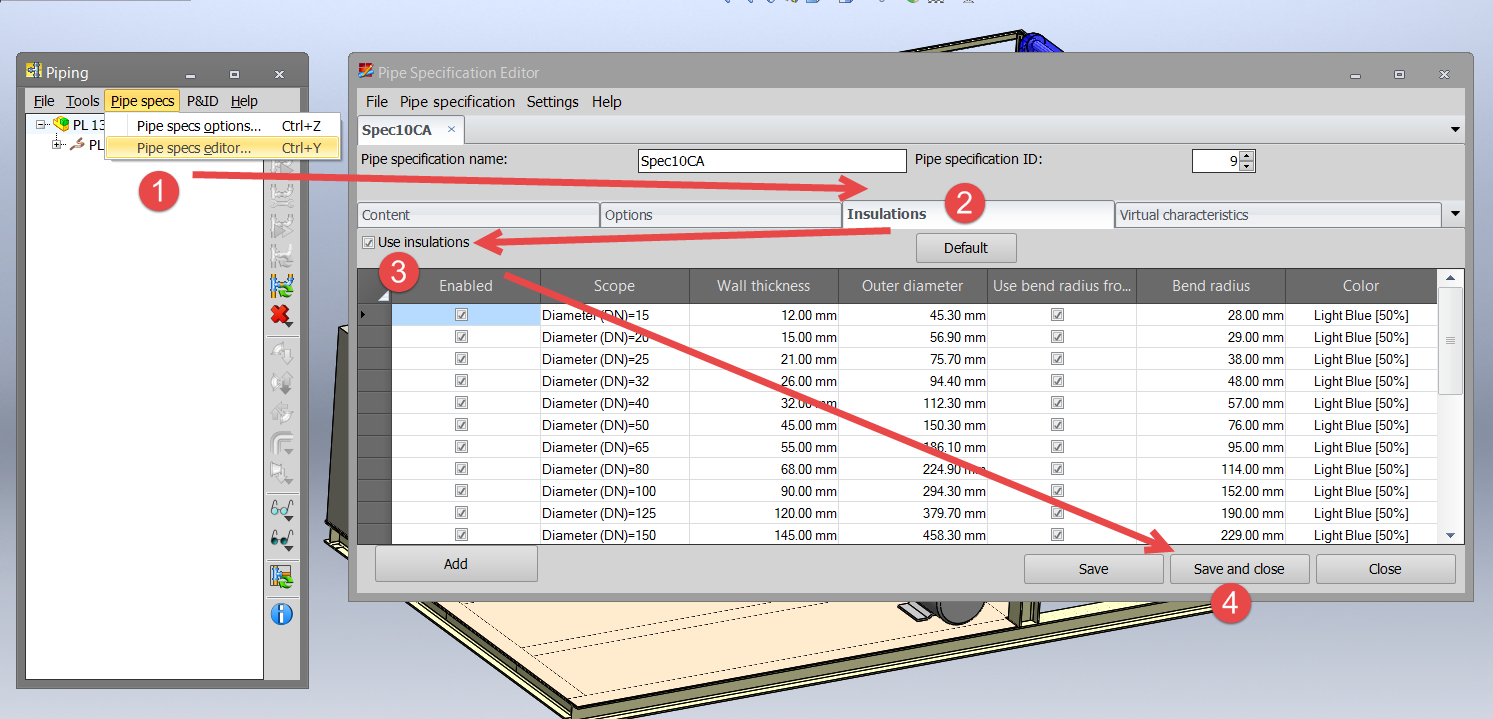
Solution: Insulation is an property of the pipe spec. 1st we need to enable the insulation option in the pipe spec being used. Open the Pipe Spec Editor and then open the pipe spec you are using. See the image below showing how to go to the “options” tab, check the box to “enable Insulation”, then Save and Close the pipe spec.
Click here to see a detailed video
With the Pipe Spec now modified to include insulation, we are ready to modify the pipeline with Smap3D. Highlight the Pipeline you want to add insulation to in the piping tree. Below I have selected the “PL 130_100”.
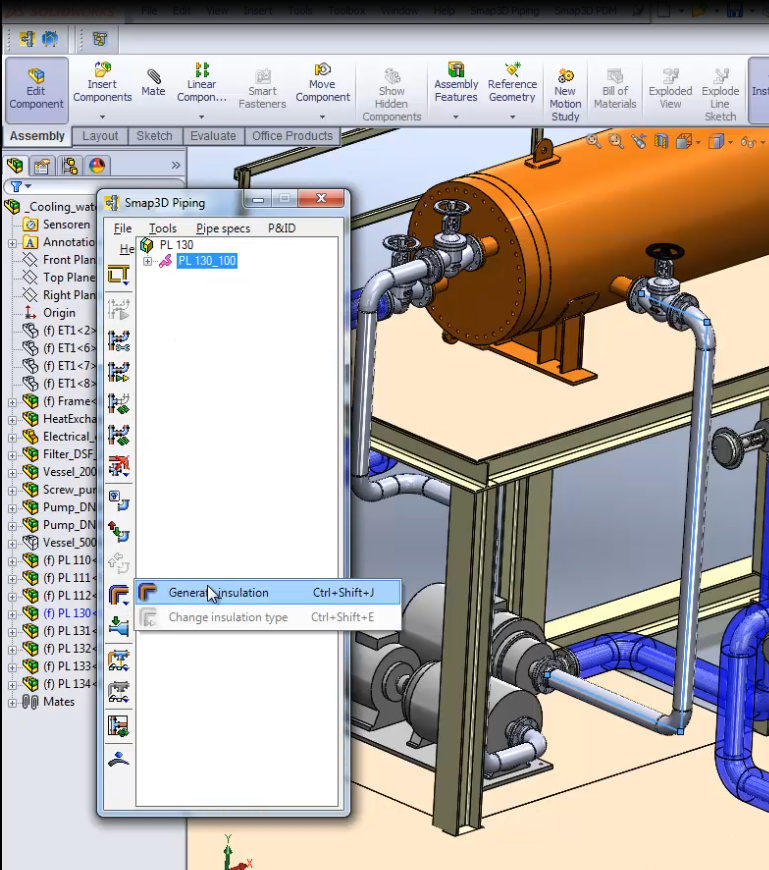
Then click on the insulation icon in the Piping toolbar and select “Generate insulation” from the flyout.
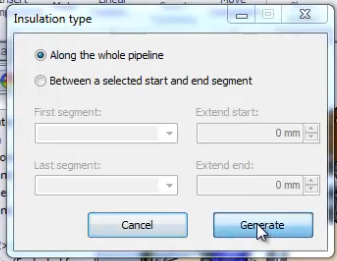
A window will pop up asking you how much of the pipeline you wish to insulate. Along the entire pipeline is what I wish to do so I click that button and the system will generate the insulation automatically. Size, color, and transparency are controlled by the insulation settings in the pipe spec.
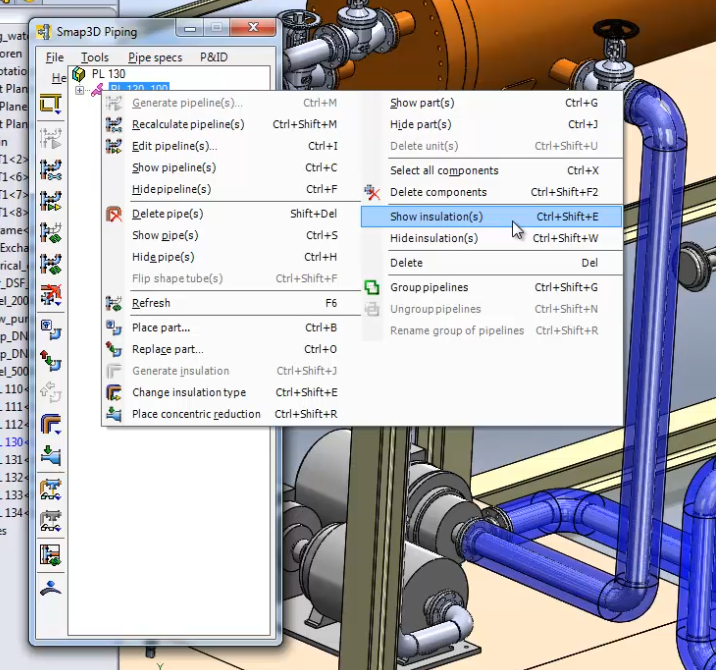
After it is generated you can control the visibility of the insulation by right clicking the pipeline in the Smap Piping tree and there you will find the options to “Hide insulation(s)” or Show insulation(s)”.
Click here to see a detailed video
#Smap #Piping #Piping in SolidWorks #Pipe insulation
 Druck
Druck